I do not have to tell most of you garage gym and CrossFit affiliate & gym owners where to get durable rubber flooring for not a lot of cash. That’s right, horse stall mats! Stall mats are easily your most affordable option for gym flooring; flooring that you’ll never have to replace or service, mind you.
At $1.66 a square foot, stall mats are a steal. They’re ¾” thick, super dense, laser cut, and sold in 4’x6′ sheets for only $40 each (Tractor Supply Co.). They are also relatively easy to acquire in person being that you are usually not very far from a TSC in this country – which means no shipping. You do not want to pay for shipping on these at 100 pounds per mat.

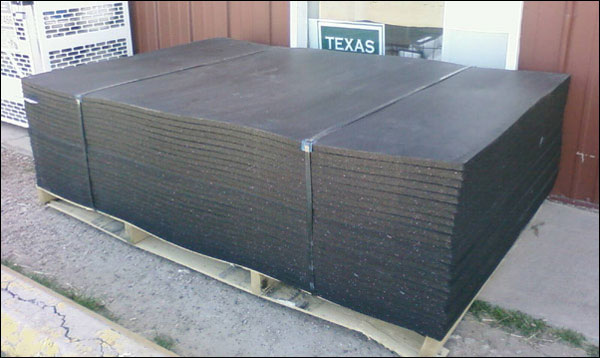
You’ve got two options when you get home with your new mats. You can throw them down where you want them and be done with it (like in the image above) or you can find a way to secure them to the foundation. Either way, you’ve got cheap, durable flooring. However; as many of you already know; if you do not secure them somehow you will spend a lot of time kicking and nudging them back into position. They will slip and slide around each time you perform any movement that ends with you or that loaded bar forcefully landing on the mats; snatching, power cleans, jumping, and so forth.
I am OCD when it comes to things like this, so I wasn’t having that sliding around business. In this article I’ll show you how I secured my mats to prevent any movement whatsoever. I’ll also offer a couple alternatives to what I’ve done. Finally, I’ll show you which method I use to cut my mats to fit the spaces and gaps left by my poor initial planning.
Keep in mind, if you’ve got enough heavy equipment sitting on enough mats, things won’t move around nearly as much; maybe not at all. You can also cover the entire garage wall-to-wall with mats, in which case you’ll only need to make cuts so that the final pieces will fit, not anchor anything down. Of course, you can also just build a platform (or buy one).
In other words, you do have options. Make sure you actually need to drill holes (and can, if you’re renting!) in your floor before you actually do.
- My method of securing stall mats
- Alternative method I – Framing
- Alternative method II – Urethane Adhesive
- Cutting stall mats for custom fits
- Finished!
How to stop stall mats from sliding around
I’ll be adding these two 4’x6′ stall mats that you see below. The width of my workout space is actually closer to 13 feet and these two mats only cover 12 feet, so there will be a 1-foot gap between the rear mat and the wall that I’ll want to fill. I’ll cut and use that spare piece off to the side there to fill that gap so it will look a bit more professional and uniform.

Let me first show you what exactly it is that I’ll be doing to keep these mats in place so you can decide if it could be a solution for your gym. If not, and you just want to know how I cut my mats, just go further down the page and skip all this.

What you see here is two stall mats side-by-side, nice and flush. The blue screws are ¼” Tapcon concrete anchors inside small metal, zinc-plated sleeves, or spacers. The anchors combined with many mats up against one another completely eliminate any sliding and/or shifting of the mats. The picture below show the sleeve and the anchor.

I only use anchors on the outer edge of my total workout space, and I don’t use them when a mat is touching a wall. I also don’t have any of these small anchors in the two mats that sit beneath my power rack because the power rack acts as a wall of sorts (see the image below.) Those mats already aren’t going anywhere.

So that’s what I’m doing; using small anchors to keep my flooring in place. No more kicking 100-lb mats back into position between sets, and no more dirt, dust, and crap that blows in from outside collecting in between the mat. It looks nice, stays cleaner, and looks far more professional than just letting them go where even they want to go.
If you’re wondering what the steel sleeves are for, they are used for a few very important reasons:
- They prevent contact between the rubber mat and the anchors. Why? They’re screws, so they’re sharp. Given enough time, these two rubbing together would probably start to shred the mat and begin to allow movement; defeating the whole purpose.
- The sleeves are larger in diameter than the screws, and also smoother. This creates a much more ideal surface for the mat to be permanently pressed against. The larger and smoother the hardware, the less likely the mat is to tear and rip if a strong lateral force is applied to the mat (a bad barbell drop, jumping, etc.)
- The sleeve actually prevents you from over tightening the anchor and tearing too deep into the mat. If you were to inadvertently tighten the anchor to the point that it was half way through the mat, you would have 50% less surface area to keep that mat in place. Also, with so little rubber under the head of the anchor, you’d probably eventually pull it all the way through and end up with the mat sitting on top of the anchor.
The screw head itself is a hair under ¼” tall. The sleeve I used is ½” tall, and the stall mats are exactly ¾” high (thick). When the sleeve is wedged into the mat it goes all the way in to the floor and leaves ¼” for the head of the anchor. The anchor cannot be screwed in any lower than just flush with the top of the mat, and you get all the benefits I outlined above.
Let’s secure some stall mats!


So you can see above (first pic above) that I have the stall mats lined up. You can see the new mat on the right and the existing mat that already has been anchored on the left.
Let me make something clear before I continue. I am not a professional installation guy or expert in home foundations. If you follow this guide and attempt this installation, you do so at your own risk. It worked for me, but I thought about it, asked questions at the hardware store, and took my time. There are other option, like here.
Here are the tools and hardware that I used. Yes, my medieval drill has a cord.
- Drill (yes, a regular drill can handle concrete)
- 3/16″ x 3½” Tapcon drill bit
- Measuring tape (for uniform holes among mats)
- Sharpee or whatever to mark your hole, probably not black
- Vacuum (must remove debris from hole)
- 1/4″ x 3/8″ x 1/2″ steel spacers (Lowes)
- Tapcon ¼” x 1¾” Concrete Anchors
- 3/8″ drill bit (any variety, it’s for the rubber)
- I also apparently have a hair in my tool pile. I didn’t need it.
Step 1 – Line up the Stall Mats

So step one is obviously line everything up how you want it and gather your hardware and tools. I personally throw a few hundred pounds of bumpers on the mats in different places to help eliminate any chance of them shifting while working with them. It seems to help but always double check that your mat is where you want it before you drill.
Step 2 – Mark and Drill
Mark where you intend to place the anchors on the mat itself. I centered mine 4″ from each edge on the corners, but that’s just how I did it. You can do it however you want.
Let me repeat so you don’t drill 80 holes in your foundation. You only need anchors on the outside edges. Mats that are surrounded by other mats and/or up against walls don’t really need to be anchored; they’ve got no where to go and rubber horse stall mats are too heavy to move around vertically.

Once you decide where to drill, use the 3/16″ Tapcon bit to drill through the mat and into the concrete just enough to mark the concrete with the bit.

You see I barely scratched up the concrete with my first go through the mat. Once I have a mark, I hold up that corner of the mat so that I can see what I’m doing; I want to drill straight down, not at an angle. Even the slightest angle will make the head of the anchor not look flush with the mats (It’s on OCD thing, and a tripping hazard).
You also need to be cleaning out the debris with your vacuum as you drill, and then again thoroughly when you’re done drilling. Try not to drill any further than you need to; as there really is no point. Having said that, you need to make sure you get all of the debris out of the hole or you’ll have issues getting the anchor all the way in and you’ll have to take it back out. Each time you take out an anchor, you weaken the holding power of that hole.

There’s the hole. Tiny little thing, right?
Step 3 – Drill the Mat and Secure
Now that you’ve got the hole in the concrete, you need to make a bigger hole in the mat for the metal sleeve. I used a 3/8″ bit because it leaves a hole big enough to force the sleeve into, but not so big it’s a loose fit.
Before you drill into the mat, make sure the small pilot hole that’s already in the mat is still directly above the hole in the floor. In other words, double check that nothing shifted. You can do this by sticking the drill bit in there, or if your hole is close enough to the edge of the mat just pick it up a few inches and look through the hole.
If it’s off a little, this is your only chance to line everything back up again because you can drill the large hole in the mat anywhere you choose over this existing hole. What I’m trying to say is that if the hole in the mat is off a hair from the hold in the floor, center the big hole over the hole in the floor, not the hole in the mat. Unless you let that mat move while drilling the first hole, there is no way you can be that far off. It shouldn’t be a problem.
Once you drill your large hole, insert the metal sleeve into that hole and push it down until it hits the floor. The picture below is to show you, however as you’ll notice I hadn’t pushed it down all the way yet.

Now all that’s left to do is tighten down the anchor screw. I suggest you do it by hand. Make sure you’re using the right size Philips head driver. If you use the drill and you either didn’t drill your hole deep enough or you didn’t clean the hole well enough, that anchor will just stop and you’ll strip the hell out of it. They’re short screws, just turn it by hand. Resist the urge to be lazy and use the drill. Get some wrist exercise for this part.
That’s what it should look like when you’re done. The mats won’t move, you won’t trip over the anchors, and your garage gym should look pretty damn professional right about now. If you ever move and want to fill the holes, Home Depot sells filler for concrete holes, and it’s easier to fill ’em than it was to drill ’em (I didn’t plan the rhyme.)
Alternative Method I
There is an alternative method, but it still requires holes in the foundation. That is to pick up some 1″ runner boards/trim boards (they are actually ¾”; lumber sizes are stupid) and then frame the entire area of your stall mats with these boards; much like a deadlift platform. If your mats come in contact with a wall and/or that elevated ledge that most garages have, well you wouldn’t need anything for those sides.
Like I said, you’ll still need to anchor those boards somehow. I see no reason not to use the same anchors that I used, but since I didn’t go this route, maybe explain your project at the hardware store and see what they suggest.
Alternative Method II
There are rubber stall mats available online that are manufactured a little different than the completely flat bottomed mats you find at TSC. They have grooves cut into the underside for the purpose of adhering the mats to the ground using a commercial urethane flooring adhesive.
I know absolutely nothing about this process. I just wanted you to know it existed. You will need to put your Google skills to work if this interests you as I have no intention of tackling this method.
Cutting Stall Mats for Custom Fits

I mentioned earlier that when I got those two new mats secured that I’d still have a small section in between the mats and the wall that would need to be filled, and you can clearly see that space in the image above. Fortunately I have a scrap mat that I can cut up to fill this gap, and I’ll show you how I do it.
The first obvious step is to measure the dimensions of the space you need to fill. I measure the distance from the mat to the wall on both sides of the mat because there is a chance they will differ slightly (stall mats are generally cut pretty well, but line enough of them up and small imperfections become larger imperfections). Once I get both measurements, I mark each side of the mat that I’ll be cutting and then use a long level and marker to draw a line from one point to the other. This will be my cutting guide.
Interestingly enough, in my situation it turned out that the distance from the mat to the wall on the left side was 3/8″ greater than the distance on the right side. So had I just taken one measurement somewhere, the cut piece wouldn’t have ended up fitting very well, if at all.

Cutting mats is just like cutting wood other than the obvious fact that mats are flexible and slightly more difficult to work with (not to mention they weigh a ton). For cutting mats, I use a cheap $40 jigsaw. Since a mat can’t support itself on sawhorses like a piece of plywood can, I take some old 2″x6″ boards, stack them 2 high and create a platform with a small gap in the middle for the jigsaw blade to travel.

I’ve lined up my line (it’s pretty hard to see in this picture, sorry) so that it travels along with the gap between my boards. The boards are close enough together than I have a nice, flat surface to cut with no play in the mats. This becomes more complicated and cumbersome when you’re cutting a full size 4’x6′ mat, but as you can see, I’ve already dealt with that and am now down to this nice, workable size.

It’s cut time. I’ve learned to take my time when doing this. Jigsaws have no problem making subtle or even sharp turns; especially when cutting something soft like these rubber mats. If you’re OCD like me, I promise that your eye will catch even slight curves in your cut once you throw that mat down on the ground, so take it slow and steady. Thankfully, you can see that the line is straight and it should fit very nicely against the laser-cut edge of the full-size mat it will be up against.
Some thoughts…
If you have a large enough table saw and a friend to help you hold the mat, I can see how that could be a faster way to make very straight cuts in these mats. I don’t have either =( Nah just kidding, but I don’t have a table saw though.
Some people even use utility knives to cut stall mats, and I’ve even started doing that lately. You need a real utility knife though – something with a very sharp blade. Cheap box cutters aren’t up to the task. I find the easiest way to cut long, straight lines is to use painters tape to mark your cut and track down the edge of that tape slowly on the first pass. Subsequent passes will cut deeper, and with less guidance.
The Finished Product
Boom! There’s my cut piece. Perfect fit!

Here’s a wider shot of my gym with the flooring finished and secured. The stall mats cannot go anywhere anymore. No more kicking!

So yeah, there you go. I hope this has been helpful to at least someone. I also hope I didn’t leave anything out! But hey, use the comments for questions. Share me please and thank you.


I was wondering what brand/model bench is that in the wide shot picture of your garage gym?
Hey David, that’s the Legend Fitness 3103 3-way Incline. I did a write-up about it, you can find it under Reviews on the top menu, the last one in the list.
Interesting – how did you get your mats to line up so well across the entire room? I just bought 9 4×6 stall mats from a farm supply store and they are really uneven – small gaps in many places across the space. Looks like yours were near perfect. Did you do something to them to get them so straight or did I just end up with a shoddy purchase?
Also, any recommendations for closing up those gaps aside from cutting (certain kinds of tape or filler?). My main concern is whether the gaps will cause problems in the future. If not, I can probably live with it. Thanks.
Hey Kyle, if it’s cold where you live and the mats were stored outdoors, they will have contracted a little bit and will stay that way until it warms up. Most of mine lined up pretty well, but there are spots where things don’t line up perfectly. I put mats that weren’t exactly 4’x6′ off to the side rather than under my feet in front of the rack. It didn’t matter if there were gaps under my GHD, for instance.
Having said all that, it is possible yours are just more weird shaped than they should be. If you bought 9 of them and they are all wacky, I’ll doubt that the rest of the stack will be any better. So long as they aren’t different heights in places that would create an uneven surface, you should be fine. Oh, and there is black caulk you can grab at Home Depot. I bought some for one spot, but I have yet to actually try it as a filler. I don’t see why it wouldn’t work, but I can’t promise that it will =p
Very good read ! I have a slightly related/ unrelated question about garage gym floors. I am in Texas as well and my garage floor has a slight downward slope towards the garage door. This is pretty standard down south but it really limits the way I’m able to set up and arrange equipment. For instance I have my rack and dead lift area set up so that my heels are facing the garage door when I lift ( seems the safest bet since I want the weight on my heels anyway) basically if I were to set up my rack near the wall like yours one side would be ever so slightly lower than the other. It may not be enough to even make a difference but it drives me crazy thinking about it. Your garage floor appears to have no slope as far as I can tell. Any suggestions other than using leveling compound or building a bulky platform ?
My garage floor has a minor grade, but I doubt that there is a height difference of more than 1/2″ over the length of the entire garage, so it’s nothing that gets in my way. I only realize it’s there if I stand a plate on it’s side and let it face the garage door… it will slowly try to leave the garage.
It sounds like I got lucky with my garage because I’ve talked to people with this problem before, and it seems some people have some very wacky garage floors. The way you describe it makes me think it’s not a subtle grade in your case. There isn’t going to be anything super simple you can do about it other than either building some sort of platform as you say, or getting the garage leveled professionally. Minor grades can be DIY’d with epoxies and compounds, but even that sounds like an ordeal from what I’ve read about it. If you set up facing the sides of the garage, nothing will roll anywhere, but if you can actually feel that you’re on a grade, I can understand why you wouldn’t want to face that way.
Just have a quick question I bought stall mats for my garage gym set up as well. But in comparison to rubber mats that are used for crossfit, are there huge difference when you drop the weight? Like the one bounces higher, less noise etc…
Thanks!
I’m not sure if there is a particular brand/style of flooring that you’re thinking of… Just think of stall mats as a thicker, less expensive rubber flooring. I don’t think that you’ll get any more or less bounce or noise using stall mats than if you forked out the dough for professionally installed rolled rubber gym flooring. CrossFit boxes us stall mats, and it’s also what gets used for the majority of DIY Olympic lifting platforms. Your bumpers have far more to do with how much bounce you get, but even still, most brands of bumpers dead blow on stall mats.
Are those some homemade jerk blocks/boxes? They look like they might be a lot less labor/material than the traditional stacking variety. Any chance you could share the plans for them or take a few more pictures of them? Do they work well for you?
I’m not sure what you’re referring to exactly… I don’t have jerk blocks though. =/
My bad! On my screen there is a photo directly below your article that shows a barbell with bumper plates sitting on top of some jerk blocks. Now I see that it appears to be an advertisement for Fringe Sports. I noticed that you had some bumpers and other Crossfit gear so I thought it was another picture from your garage gym. Great article – thanks for sharing.
I’m going to play around with some double-sided carpet tape to see if it will hold the mats in place. The underside of my mats are textured so I’m not sure I’ll be able to find something that will hold well enough.
Oh haha, ya that’s Chad Vaughn’s personal blocks. They’re pretty neat, but if you see them from any other angle, they are certainly not light on materials. Matter of fact, if you click on that picture it’ll take you to a product page, and like the 8 or 9th picture you can see how they are made.
I tried double sided carpet tape with my first couple mats. It didn’t do much of anything unfortunately, and it is because of that texture. I talked to a flooring guy at one point, and there are flooring adhesives you can use, but I got the impression it would never come back off if I needed it to.
Yeah, you are right on both accounts. That 2nd picture of those blocks tells a different story than that partial picture…pretty beefy and lots of wood.
I went today and got more mats and there’s nothing that is going to stick to the backside of these things. They are so rough and shed so much that I’m not even going to bother trying any sort of tape. I have them surrounded on 3 sides so they only drift in one direction…and it’s only a tiny bit over time so I don’t think I’m going to worry about it for now.
My local TSC had those rubber mats for only $30!! I’m really glad you made this website, lots of great info! keep up the good work!!!!!
That’s lucky. I don’t think I’ve ever caught those on sale. Nice find, and thank you.
Nice informative article! For cutting rubber, leather, and Styrofoam I’ve had great success using the smooth knife-edge style blade in a saber saw. Cuts like butter and there’s no “sawdust” to clean up. Thanks for sharing.
I can see how that could work better than the default wood cutting blade. I also found a utility knife of a slightly higher quality than most of them that came with some super sharp blades. A lot smoother cut than I had experienced with knives in the past. I cut the mats for my platform with it and they look almost laser cut I got the line so straight. Thanks Steve.
would you recommend using the utility blade over the jigsaw. can you post the link of the utility knife you used? Thanks !!!
Yeah I would… For a while I preferred the saw because the blades I had were just crap. When I bought a real knife with real blades, soooooo much easier. =)
Here’s the link to Amazon http://amzn.to/2i4PEPT, but I picked mine up at the TSC. Can probably get it anywhere really: Home Depot, Lowes, etc.
Thank you !!!
Another helpful tip:
Use a metal yardstick to score a line with the utility knife. Then place a 2×4 or plastic pipe under the mat at the cut. This helps to pull the mat apart creating less friction when cutting through. Then a little secret sauce (wd40) sprayed along the scored cut. Cuts like hot knife through butter. I can’t tell my cut from the manufacturers.
I like that WD-40 idea. I’m going to try that next time I have to cut one of my mats.
Been jumping around your website all day! Thank you for all of the awesome content! I have a question for you…I will be moving into a house in a couple weeks and I will be renting. I cannot drill into the garage concrete so I wanted to hear your thoughts on using the stall mats and a power rack that does not need to be anchored (because I can’t do that). Thanks a lot!
Thanks Logan. There are a number of racks and stands that don’t need to be anchored. You can just put a couple mats down and put the rack on top, it will be fine. There are a ton of people who either can’t or just don’t want to drill into the foundation.
Look at stands like the Rogue HR-2, the S-series or SML-series to get an idea of what kind of stands work. You don’t have to buy a Rogue but by reading their product descriptions you can see what kind of set up should be anchored, and what doesn’t have to be. Narrow racks like the R3 should probably be anchored, but the deeper racks not so much so long as they have stabilizers (look at the R4 to see how that works if you’re not sure.) Fringesport also has that squat+pull-up that will stay put without anchors.
That help any, or did I miss the point?
No, you hit the nail right on the head! Thanks a lot! I am just being super picky, trying to find the cheapest option that allows me store plates, set up safety bars, not anchor, and is aesthetically pleasing. The fringesport squat+pull-up is very economical and meets my criteria, but just doesn’t have that sexiness that the HR2 half-rack has. But that HR2 half-rack is more expensive and the add-ons are pricey (for someone who just graduated and has student loans to pay haha). Decisions decisions…
haha ya Rogue racks do have a certain appeal to them; I suppose that’s why they sell so many of them. I recently told Fringesport that they should find a price that includes the spotter arms that is competitive with the other racks out there. It used to come with spotters for $429. It was hard to care about sexiness at that price, but I guess they were losing money on that deal because they pulled it.
Yeah, paying an extra $100 for the spotters is almost a deal breaker. Do you know of any similar style racks that are less expensive?
No, sorry. You have to move into the garbage gear to get any cheaper really. Amazon racks, Dick’s, those fitness outlets, etc. GetRxd has one similar; the Guillotine, but I’ve heard horrible things about the quality of it; much like the Titan line (the brand that poorly mimics Rogue racks for 1/2 the price.) Anything cheaper than Fringe’s is sketchy. Even the Fringe rack won’t compare to Rogue or better. Fringe is still imported, but I’ve seen it in person; the holes lined up, and the steel and hardware is actually the same as Rogue’s. Well, same size/gauge. Certainly not the same mill.
Mmmm…good to know. That’s too bad. I’m probably going to go with the Fringe unless rogue has a sale in the very near future…
Don’t hold your breath.. unless you can hold it until Black Friday =p
Rogue doesn’t do sales but that one time each year.
You are a Godsend! Thank you so much for posting this valuable information! My husband and I have been searching high and low for an affordable option for our garage gym floor! This is a perfrect cost effective idea. We were getting sick to our stomach at the thought of plopping down close to 1k on rubber flooring that was only 1/4 inch thick! We are so glad you compiled this information for the novices like us! WE LOVE YOU!!!!!!!!!!!!!!!!!!!!!!!!!!!!!!!!!
haha thank you very much for saying that. I’m glad the article was helpful =)
Tanks for this article – very helpful. Do you even experience any problems with the screws in terms of digging into your back or catching yourself on them when training? Thanks in advance.
I’ve never had any issues with them whatsoever. They are a hair below he line of the mat, but still so close to being flush that you’d never know you were standing on them. I re-arranged a little bit at one point and re-cut some mats to accommodate a different rack, and the screws came out and went back in easy as can be. I like this a lot more than adhesive because it does come back up and all I have to do is put a little concrete filler in the holes. No adhesive to scrape up, like if I were to sell the house or something.
I appreciate your reply. This is an excellent overview. I am about to do this with 240sq feet.
You will probably need very mats to be attached. mats bumped up against walls or other mats don’t tend to go anywhere. Just those on the outer perimeter will move.
very *few*
I’m concerned about drilling into the concrete too but I love your setup. What kind of concrete filler for the holes would you use? I’m having trouble finding a specific product for that and want to figure that out before I drill into my basement slab.
Mitch I bought filler at Home Depot. It comes in caulking tube. Matter of fact I think it was on the same aisle as regular caulk. I do not recall the brand – I tossed the tube when I was done
This guide was very helpful. Thank you for taking the time to document your project and providing these instructions and photos. Now, I’m off to Home Depot to buy some Tapcon concrete anchors and Hillman steel spacers.
By the way: providing that photo of the materials you used was incredibly helpful. I printed it out and I’m going to take it with me to the store.
Thanks Jeff. Yeah I did that because the hardware aisle is a PITA already, even when you think you know what you’re looking for. It’s worse when you don’t.
Great article! I have similar flooring in my basement (Bought from a farm/garden store) and wondering what you use to clean yours? Mine are now very slippery when wet from dripping sweat and I’m wondering if a buildup is causing them to be more slippery. I typically train barefoot but my wife has the same issue when wearing footwear. Any advice would be greatly appreciated.
Thanks,
Pat
Hey thanks Pat. Yeah they’ll get grungy after a while. To keep mine clean, I literally just vacuum then mop the mats with normal floor cleaner, like the stuff you’d use to mop up tile or linoleum. Fabuloso, Pine Sol, etc. I do this as needed, maybe every other week or so.
I just put down 11 of these on my basement floor. I bought the mats from Tractor Supply. I used a (3) rolls of $25 underlayment from Lowe’s to act as a moisture barrier. Then after I pieced together the room from edge to edge, I used GE Black Silicone Caulk to permanently connect the floors together. The caulk adhered to the rough cut edges of the horse stall mats very well and did not stick to the top layer so it made it extremely easy to clean up (all you had to do was peel it back). Having it all caulked together, I do not have to worry about any water seeping underneath the mats and building up mildew or mold in our house.
I’ve not heard of doing that, but it sounds like it works nicely. I’ll have to try that myself in the future. Thanks Josh
Is the vapor barrier to protect against mold? im also concerned about this. has anyone else had an issue with mold without any sort of vapor barrier?
I’ve personally never heard anyone complain about mold, and I’ve never had that problem myself – and I don’t use anything to prevent mold AND I commonly have water in my garage when it rains. I’m not even careful about water when I mop the gym.
I think you’d have to have a serious moisture problem to have mold, and I think you’d already have that mold long before laying down stall mats.
I recently moved and when I pulled up my stall mats there was mold on the bottom of the mats. And after pulling them all up the garage smelled like mold. I’m looking at ways to prevent this at our new house (which brought me to this site). The mats don’t have any ridges on them and are flat on both sides so maybe that is the problem. The vapour barrier might be the way to go. I live in Southern Ontario, Canada so its very humid in the summer. Anyone else run into issues like this and solve it?
Great write up. Can I bolt my uprights to the floor through the mat or do I have to cut around the foot?
I’ve always seen and done it by cutting out the holes and making sure the rack is flat on the ground itself. I’m sure it wouldn’t be a problem 9 times out of 10, but it just doesn’t seem as though it would be as stable as it could be by setting it on the mats. It’s really easy to cut the mats with a sharp utility knife, seems worth the extra step.
This article was EXTREMELY helpful. Saved me about $500 and a lot of headache. I found this article yesterday, got the supplies, and successfully installed my new gym flooring the same night.
Before and after pictures
https://scontent.xx.fbcdn.net/hphotos-xpf1/v/t1.0-9/12316073_1166663440014430_6243305230956134937_n.jpg?oh=89129514ef013b9da4bedb905c53f810&oe=56DFAEDB
Next up is painting and trim and then a few more improvements.
See how much better that is! Looks good.
Did you find the anchors easy to use? I was concerned when I wrote the article that people were going to destroy their foundation or something. Or that no one would even try it.
The anchors were not too much of a pain. I had a few holes that were more difficult to drill than others but I chalked it up to just thicker foundation or possibly because I had to switch to a fully charged battery. The only step I did differently was cutting thw mats. I used a classic Stanley utility knife, straight edge, and WD40. After the first mat I got a good system and cut thru the mats pretty easily. WD40 worked beautifully.
I have since switched to using utility knives as well. I think I had bad blades when I tried before, because the last time I did it I bought a whole new kit and it worked well. No more saw. In any case, glad it went well. Thanks for the feedback too.
Any thoughts on handling the slope in a garage? Further you get from the house wall, the more the bar is ready to run at my shins…Most garages require a slope. Figured I would see if/how you dealt with this.
Honestly the slope in my garage is so subtle as to almost not even be there. I also have everything positioned at a 90 degree angle to that slope rather than with it.
I’ve heard of people having to make custom platforms that counter the grade when it’s a bit more excessive than it needed to be, but unfortunately I have no specifics on how they made that work. For lifts that start from the floor, maybe a couple wedges or door stoppers under each side of the bumpers to prevent them from rolling into you (or away.) I don’t envy your situation, and I wish I had more advice to give you than that. Maybe somebody else will see this and help out.
Theres a couple options I can think of.
1. Build a lifting platform as mentioned before me that counteracts the grade.
2. Scrap lumber, 2×4 and 4×4 work well to stop the weights from rolling (its what I use during the summer on my driveway.
3. Orient yourself so the weights roll away and not into you (while utilizing stop blocks to prevent it from running into your garage door. Most garages should not have much of a slope, maybe 2% but I’m not 100% sure on your situation.
I bought all the stuff and I am about to build an 8×8 Olympic platform(the basic one except with two total layers of plywood instead of three). Would you recommend using screws or adhesive if I might add a Layer in a year or two? What’s the best way to cut the mats?
Screws are more than adequate to keep it together. You don’t need adhesive, but you can if you want though. If you ever need to take that apart either for a move or because it gets wet and warps, the adhesive will completely prevent that. You will have somehow lift and cut that thing into smaller pieces. I had to do it once; not fun.
Use a new, sharp utility knife to cut the mats. It will take a few passes, but it will make a nice straight cut if you don’t rush or cut deeper with each pass than is possible without having to push super hard. The harder you push, the harder it is to keep the cut straight. I found marking my line with blue painters tape rather than trying to use pens or markers was better.
I bought the cheaper plywood so I’m looking to paint the whole thing a solid color. Will it chip? Is there a specific pain i should use? Also if I stencil something over it will it be too thick?
That’s something I’d ask the paint guy at the Home Depot or Sherwin-Williams. I want to say that latex will probably not chip, but that stuff isn’t really designed to be walked on, so who knows. They’ll know at the store though.
If you paint it one color, then use spray paint with a stencil, you won’t notice a difference in thickness. Dried spray paint has a thickness of like 3-5 thousandths of an inch. About as substantial as a piece of dust, which you’re already stepping on and not noticing.
After seeing your post I bought some of these 3/4″ mats from a local IFA because TSC was out of them and They said there mats are higher quality. I put them in my basement and love them to work out on. However, the odor they give off is so Strong I can taste the rubber in my mouth. It also quickly spread through my entire house. I had to throw them out in the garage. They’ve been there a couple of months and I can still smell them when I go into the garage. I tried cleaning with simple green, sprayed with Lysol, and febreeze. Doesn’t seem to help. Any suggestions? I really love the mats, but have to get rid of the odor.
Oh you brought those inside? Yeah kind of an outdoor/garage item. The smell will go away. I’m surprised it hasn’t already within a couple months. Usually is pretty strong for a couple weeks then it starts to fade.
Also, if the store just received a new batch they will be stronger. TSC keeps theirs outside on a pallet generally, so the smell gets to be released to a pretty good extent before they are taken home. But yeah, rubber stinks; no doubt about it, but just like with bumpers, it will go away. Maybe taking them out of the garage and putting them on the patio for a week will help so that the smell can actually dissipate a little rather than hang in the air in the garage.
This just saved me a ton of cash, thanks!
I was curious how you deal with expansion/contraction of the mats? In the box I go to, during the summer when its hot the mats start to expand and “bubble” up and then in the winter we get gaps between them where they shrink up. Is this just an unavoidable consequence of our weather or does it depend on the type of mats/how they’re installed?
it’s just part of having rubber exposed to the elements. I’m in Texas, and I installed mine when it was already warm so they don’t expand to the point of bubbling or bowing out, however they do contract a bit in the winter, but since it’s a Texas (central) winter, it’s not that extreme. Unless you’re in Alaska or Newfoundland, the contraction shouldn’t be so bad that you’re tripping on the gaps. The bubbling is worse, so don’t install them when it’s freezing unless you leave the gap on purpose in expectation of the expansion. The only real way to avoid this totally is to have seamless commercial flooring installed… not worth it.
So I guess my next question would be whether or not one should worry about the expansion/contraction pulling the mats off of the concrete mounting screws if we install them like you’ve showed in this post?
Oh no, those will not be coming out because of contraction. But remember you don’t stick anchors in every mat. Just any outer edge that isn’t already held in place by something else (the wall, feet of an anchored rack, etc.) and only on the outer edge of those particular mats. Keep in mind these things don’t move around easily, so it doesn’t take a whole lot to lock them down. Don’t get carried away with it.
Awesome…that makes sense. Thanks man!
Curious about these mats, I could find out for myself no problem at my local TSC but I am a jiu jitsu practitioner looking to put down mats for a home gym and also a place to roll. My question is would these mats be thick enough yet soft enough for grappling?
Oh no, probably not. I dont even like stretching on the things
You mentioned that you initially installed your power rack too far away from the wall originally, how far away from a mirrored wall would you mount your power rack now?
Right now, with plates on the storage pins of the back upright, there is about 3″ of clearance between the stored plates and the wall… so I’m going to say that the back upright is about a foot away or so. I just played with it a bit before I anchored it and cut the mats and got it where it “felt” right, there was no science to it.
Extremely helpful guide. Thank you! I am in Texas as well and I am wondering which fan you use to cool your garage? Thank you.
My garage is air conditioned actually. Prior to having that installed, I had a 36″ high-speed steel fan from Home Dept. About $150 – gets going pretty fast, and it’s pretty loud. It was better than the crap you can buy at Target or Wal-Mart or whatever. If I had to do it again, I’d buy a wall-mount steel fan. Something I could position high and out of the way, and in the back of the garage away from the garage door where all the heat comes from.
First of all, I want to commend you and your time and effort in putting this website into action. It is by far one of the best ones on the internet that skips all the BS and gets right down to it. Thanks again…
Regarding this article, well read and informative. I am in the process and creating my own garage gym. I have decided on an area 12 x 16. I too, purchased the horse stall mats form TSC and love them. My next step after I solve the stall mats issue is to start adding to my garage gym.
Here are my two questions:
1. Is it possible that I could mount several pieces of wood boards (3 ft length, 3 inches wide, 3/4 inch thick) along the outer edge of my stall mats, using liquid nails? I really don’t want to drill into my concrete foundation in my garage and think that this alternative might work. What I’m planning on doing is moving things around in about a year, so I don’t want to drill any holes right now
2. Any idea if the boards can be removed with some effort (for example using a spatula) after mounting with liquid nails?
thanks again!
Thanks George, I appreciate that. Yes that will work. I’ve used liquid nails to hold wood to the concrete foundation, and with persistence it can be gotten back up.. I used a wide chisel myself
Also let me add that many mats side-by-side, it doesn’t take much to keep them in place. Even when not anchored down somehow they only move little by little.
Was any damage done to the concrete when you removed the wood glued with liquid nails?
No. I think there was some minor discoloration – almost like when you get concrete wet, but honestly it was nothing and it may have already been there. Certainly no chipping or anything of that nature. The chisel slid along the surface under the adhesive fine. Once the liquid nails loses it’s bond somewhere it just seemed to come off in big chips. If there is chipping of the foundation where you put liquid nails I’ll bet that it makes it worse when you pull it up, but if it’s sealed and flat, no problem.
it’s not going to take much either. I wouldn’t lay it on super thick or anything.
You can also try silicone. It won’t hold as strong but it will be easier to remove. If you have a few days to spare. Try using liquid nails on a test piece and then silicone on a test piece and see what one works best for you.
Are you referring to silicone caulk? Silicone Adhesive?
Hey Matt, i was wondering, how did you go about to setup the power rack? i live in a rental, theres tile floor, and the landlord lives in the house below, we got the same flooring you talk about here, but putting our rack on top of it leaves very wobbly and were afraid setting it up directly on the tile, will cause it to break. I guess we know we would just have to drill it into the tile , but we where wondering if you have some info on this?
Hope you can help us!
Did your matts endure HITT? Just from one workout with burpees and manmakers the matt is tore up and has lots of peices
oh yeah, you cannot hurt stall mats.
The foam stuff you buy in tiles and some of the softer rubber mats out there are total garbage for training.. A lot of that stuff is really just meant to set a treadmill or something on, or maybe some Yoga. If you want to toss weights and jump around and such, stall mats are the way to go.
Could you park a car on these stall mats? We want a garage gym but not lose a parking spot as well
Absolutely. I pull my truck in every night. I don’t think it’s possible to damage these things without simply cutting them up or throwing them in a bonfire
Great read and very helpful information! I plan on turning part of my basement into a gym. Can I still use the same approach the you described with the screws in my unfinished basement? I know that my house sits near a wetland and I have had some water concerns in the past where I ended up getting an epoxy injection to stop the leaking in the walls. Would this be a concern by making small holes in my basement floor?
There isn’t any reason you shouldn’t be able to since the screw are really rather short, but since you’ve had issues down there already I’d want to be careful. You may want to consult a foundation repair company and see what they say, or just use epoxy or adhesive to keep the mats in place rather than drilling.
Another solution is to lay out the mats where you want them, then run a border of 1×2″ boards around the mats and use liquid nails to lock those down. If you ever have to pull the flooring up, you only have to get the boards unstuck, not multiple 24 square foot mats. Liquid nails will hold wood down really well – its unlikely that would ever come loose, and there is no holes.
Great post, thank you for sharing. I visited my local TSC, and wanted to physically see the stall mats before I bought them. When I got close to them I immediately noticed that they have a very strong smell.
I was wondering, does the smell linger, does your garage have a strong odor due to these mats. Or does the smell go away permanently?
Yeah that’s just rubber for you. It dissipates over time, just like with bumper plates, though I wouldn’t expect it to be undetectable in the near future.
Hey, in the process of putting my gym together and purchased some stall mats. What is your opinion on deadlift pads vs stall mats for only deadlifting (no Olympic lifts)? Max. deadlift right now is probably somewhere just shy of 500, but have a goal of 700. Do you think the stall mats would protect the concrete or would you think that a deadlift pad is necessary to help disperse the impact?
I’d build up something for that kind of weight. So long as you’re using bumpers with those stall mats, it’s unlikely that anything would happen, but it has before. Mats, pads, and platforms cost way, way less than foundation repair.
Went ahead and built a platform. Did 3/4 plywood on the bottom, then 3/4 standing platform and the stall mats (3/4) for the weights. Think this will be enough? I do not have bumpers… I was originally looking at bumpers to keep the sound down but didn’t want to fork over the money. Especially with the number of 45lbs plates I would have needed. I stumbled into some weight lifting equipment from a family friend that got me a good start on plates. All I needed was to add some 45’s (friend gave me 4 and I added 6). Would love some bumpers but maybe that will be a luxury purchase a little further down the road.
Yeah that should do just fine, especially since you’re not snatching or jerking.
I’d just stick with steel plates in your case anyway. Getting 500-700 pounds on the bar would require at least a partial collection of comp bumpers.
I am working on putting the stall mats down, but was thinking of reinforcing the mats with 2, 3/4″ sheets of plywood under them. I wanted it to as close to a platform as I could but didn’t know if that would be necessary. Any help would be appreciated.
Thanks
It’s one thing to build a platform, but quite another to line your whole floor with plywood and and stall mats. Seems like overkill to me.
What a great website! You saved us money, time and numerous quarrels over the best way to cover our garage floor for our home gym. Thanks so much.
You got it!
FOR GETTING OUT THE SMELL:
I went on TSC website and started reviewing questions asked to the supplier. They recommended spreading an expensive coffee around the mat to act as a type of charcoal and absorb the smell. Also, I was trying to figure out why some mats are completely flat on top and some have indented pattern. It seems as though it’s due to the region you are in.
How did the coffee grounds work for you? I’ve been wanting to make a gym inside my house and don’t want the rubber smell to ruin everything.
How long are the concrete anchors you used to bolt down your power rack?
They are the same anchors Rogue recommends and sells, though I picked mine up at Home Depot – they are 3/8″ x 3″ long.
Thanks, I’ll check out Home Depot. How thick is your slab? Mine is 4″ so I’m thinking 3″ anchors might be too long. Have you come across anyone using 2.5″ anchors?
I don’t know how thick my slab is actually. I have not, but if I were to use smaller than the recommended anchors I’d definitely use all 12 (assuming there are 3 holes per upright).
REALLY helpful article. One question. My wife still parks her SUV on one side of the garage, then I pull it out at night to set up crossfit. i’m worried the weight of the SUV will compact the pad? Has anyone had any issues with that? I could build some plywood with rubber coating pads where the SUV tires lie?
Your vehicle will not compress stall mats. I park a truck on mine every night – have for years. Foam pads won’t take that for long though, but the horse stall mats will.
I’m just curious as to what you use to clean the stall mats? And what did you do to kill the strong rubber Odor? I find my stall mats rubber ODOR unbearable. Thanks.
Sorry for the delay in approval Amanda. I just use normal mop water like Mr Clean or Fabuloso or something. Sweep or vacuum then mop.
The rubber smell will ultimately dissipate. You can wash them down then store them outside to help speed that up, but to my knowledge you cannot completely eliminate it even by cleaning them when they are new.
Do you ever notice water buildup underneath the stall mats? I’m planning on purchasing some stall mats to install in my unfinished basement to create a workout space. I’ve previously had the cheap square mats that hook together and have noticed water buildup underneath them over time and then dry up and leave markings on the basement concrete. This could be due to basement concrete vs garage concrete, but was curious what experience you’ve had with that.
No, but water very rarely gets into the garage. I don’t know how moisture levels differ from a garage to basement though. I suppose unless your basement is climate controlled, moisture could actually be a problem with no way to remove it (via air conditioning/dehumidifier or just opening a garage door).
Thank you for sharing your experience. I installed my flooring the same way you identified above, and it has been a walk in the park… and truly the best meathod for home gyms (and boxes). Thanks for outlining the anchors and spacers—makes all the difference for a clean and polished look!
I’m glad that worked out well for you. I’ve often wondered how many people took the time to get everything situated like I have rather than just tossing them down and having to kick them around all the time
Thanks for sharing this article, super helpful. I live in a townhouse with no garage so my gym setup is indoors. I’m sick and tired of lifting on carpet (not super thick, but not the thinnest either) for reasons you can imagine so I’ve decided to put down some flooring. I don’t plan on cover the entire floor (don’t have that kind of money) but instead was thinking I’d just do an 8×8 lifting platform type deal. My rack doesn’t attach to the floor (it’s a Rogue ML Flat Foot) so I plan on just putting it on top of the platform. The issue is that my rack is slightly wider than the middle piece of plywood that is given in most DIY lifting platform instructions out there. I don’t really have the tools to cut up plywood myself to make that work so I’m inclined to just put down 8×8 feet of a plywood based and then cover the entire thing with stall mats, which would probably take 3 instead of the usual 2 for a standard platform, which is no big deal to me. If I did this do you think I’d need to have 2 layers of plywood (2 on bottom, 2 perpendicular to those on top) screwed together and then screw down the mats on top? Or could I get away with just laying down 2 sheets of plywood (not screwed together) and then screwing in the mats on top of that?
Hrmm, if this is sitting on carpet then I’m not sure that a single layer of plywood covered with mats would feel all that stable. Carpet is never going to be completely flat and flush like a foundation, and mats have play in them so using them to basically pin together and hold in place the two pieces of plywood seems unreliable. I think the double plywood layers of a normal platform with the top rubber layer is the way to go. You can certainly try it with one layer and see how it feels, but I’m thinking it will feel as though it’s moving under you. That would be my guess.
I’ve been reading through a bunch of your articles again as my wife and I recently moved and we’re about to pull the trigger on setting up our full-on home gym and I was curious whether you had any experience with intentionally leaving a gap between the stall mats and the garage foundation wall. No matter what I seem to do, the mats never seem to line up just right and I’m thinking that if I line the mats up with eachother and not the walls, that may help to eliminate the issue altogether.
You can absolutely set up the mats to be flush with one another but leave whatever small gaps you need to leave around the perimeter if the foundation walls aren’t straight. I have minor gaps along the front end of the garage where that 3-4″ flood lip is. As an OCD person it’s annoying to look at but it has no other impact on anything.
Remember though that during the colder months the mats will contract and you’ll have gaps everywhere, so anywhere you already had a gap will have a larger gap and the mats will move around a bit more. This is just the way it is when not using seamless flooring. Still, it’s no big deal so long as your gap never becomes big enough for your shoes to catch on.
Thanks for the quick reply! I completely understand the OCD aspect, but I’d rather them be a little awkward looking against the wall as opposed to creating a weird gap in the middle of my flooring. I figured I’d only secure the mats on two sides and then secure the other two later on in the year. Thanks again, your reviews are as always fantastic and help all of us garage gym folks out immensely!
Can I just create a 3/4” thick by say a 8” wide wood frame all around the mats and box them in so they don’t move?
You can, yes. I’ve seen that done at least partially – the walls hole a couple sides in place, then a frame holds the others.
I just installed 9 stall mats this weekend and noted 2 things worth mentioning I think:
1. My walls were not square, this required me to trim the 3 mats against the wall
2. There is rebar or something in my flooring which destroyed 4 drill bits in the process of drilling 11 holes. I still don’t have a good solution, I’m going to cut the tips off the screws and hope for the best. I did check to make sure my floor wasn’t pretensioned for earthquakes, a buddy in a newer house has this (it is stamped in the concrete of his garage). You shouldn’t drill into a floor if you have this.
Overall, this was the most cost effective way to get flooring down that will last forever, it isn’t perfect but it is good enough for lifting and dropping heavy weights. A huge thank you for the guide and the step by step install process, saved me a bunch of redneck engineering.
Thank you very much… and you got very unlucky with hitting that much steel.
Hi,
This is an awesome setup, very inspirational. Question on keeping the rack on or off the mat. I have a Titan T3 rack, it is not bolted down (and I can’t, because my garage has a concrete post-tension). Is it OK to let the rack sit on the mat, or should it sit on the concrete?
I have the Tractor Supply mat, and I would image that over time, with the weight of the rack, and plates hanging on the rack, that the mat would compress in certain spots leaving an uneven surface. Mat on rack, or on concrete?
Thanks!
I see people doing both. Those stall mats are pretty tough, and sure maybe you compress them slightly over the years but assuming it’s staying put I don’t see how that would be a problem. If it ever does become an issue, all you’d need to do is take a market and trace out the feet of the rack then take a sharp utility knife and cut out slots for the feet. Then bam, you’re rack is on the foundation but you still have 100% mat coverage.
Have any recommendations for dealing with moisture under the mats?
Jeez maybe just a dehumidifier. How is it getting so wet under there that you’d even notice?
First of all, THANK YOU! You gift wrapped this for us. I just got done installing the mats and noticed that they’re actually quite slippery. I noticed it while installing them, and again while working out wearing different shoes. I’m assuming it’s the water resistant material that come on the mats?
Anyhow, did you or anyone else experience this ? If so, is there a way to make it less slippery or gain more traction?
They’ve changed these mats a bit since I published this… putting some kind of texture on the bottom I hear. Though they have always slid around. Even if you were to somehow make them as grippy to the concrete as possible, dropping weights and moving/jumping around on the mats will cause them to shift around, so you’re going to either border them in by flooring the whole garage, or install them to the floor somehow.
So I’m not actually referring to the bottom side being slippery, it’s actually the top side. I don’t have any traction while working out because the surface of the mats are really slippery. My feet slide when applying force. I wasn’t sure if there was any kind of solvent or material I can apply to them to make them more anti slip and gain traction. Or any other possible solution that would help.
They really shouldn’t be slippery. Maybe they need a good cleaning with a degreaser… maybe hit a couple mats with Fabuloso or Pine Sol or even an industrial-grade floor cleaner and see if that helps. They really should not be slick so it could just be factory grossness on them.
Yea I’ll go ahead and give that a try on small section and see what works. I appreciate the feedback.
Right now I’m lifting on just some simple cut out, relatively cheap workout pads off of amazon. As I’m getting into heavier deadlifts/cleans/snatches/etc I am looking into some better options to protect my cement garage floor. What are your thoughts on building a lifting platform as opposed to simply laying down some stall mats? Any advice appreciated! – Nat
I was without a platform for years, then got rid of it after only a couple years and am again just lifting on a single layer of stall mats. I haven’t personally had any foundation issues and most don’t, but if you want to be better safe than sorry you should build a platform.
The horse stall mats form Tractor Supply Co were a great recommendation that I would not have found without your site. Wish I could have given you the commission through a link; most of my TSC’s are sold out right now due to the Corona, but I was able to track few down and appreciate the recommendation!
I appreciate that. It’s all good though. I’ll take a referral where I can get it but it’s not why I do what I do, and not everything worth recommending even comes with a way to get a referral, but I’ll recommend those items worthy of a recommendation nonetheless. That is very nice of you though. Thank you.
Can use USP 3-1/2-in x 1-11/16-in 22-Gauge Galvanized Mending Plates
Item #14381 Model #TPP24 from Lowe’s / Home Depot / Other Hardware Store to secure the mats to each other underneath if you don’t want to fasten to the floor. These are typically used in attics wherever there is a rafter joint to secure all pieces.
https://www.lowes.com/pd/USP-3-1-2-in-x-1-11-16-in-22-Gauge-Galvanized-Mending-Plates/3374514
You know, I’ve not tried that but it just might work if you can get those prongs embedded all the way in the mats. It’s an interesting idea for sure and I’d love to hear about how it works for you if you try it.
Didn’t see anyone ask this question. How is the smell. Does it eventually go away.
It does go away. Not right away, but it does.
Thanks for the detailed step by step instruction!
I know its overkill but I’ve read adding plywood helps distribute the weight and the rubber mats help dampen the noise. I’m wondering rather than securing the mats to the floor (as I don’t want to drill into my basement concrete) can I secure the mats by following your method and secure it into 3/4″ plywood and just place it on the concrete?
My plan is to buy 4 x stall mat’s (4×6) + 4 (4×6) plywood – use your method to secure the mats to the wood + use 4 mending plates on each of the plywood sides secure the 4 plywood together – end result would be a secure 8 x 12 area which will hold DB rack, bench and a future powerrack.
For this can I still use the same anchor and spacer or would you recommend something else? Thoughts?
Appreciate your time and feedback.
Thanks!
Plywood is a bit of overkill for the flooring. It’s one thing on a platform, but the whole gym? You may only be doing 4 mats now, but what happens when you expand? You’d have to keep adding both layers. I mean you can if you simply don’t have anywhere to expand to, or don’t mind.
Alternatively, if you don’t want to drill into the foundation, you could just use a bunch of mending plates on the mats alone. If any section of the combined mats is pinned down by a power rack, dumbbell rack, etc, your mats would stay in place. SHOULD, anyway. Obviously the more mats the better, but four mats with at least three mending plates per contact point between two mats, and a power rack sitting on one side should stay still.
If you do the wood, the anchors are probably too long. I’d use 1-1/4″ long wood screw. Just make sure to stop a hair below the surface of the mat. Don’t dig in too deep.
This was Awesome!! Thanks for sharing.