This is a simple and brief DIY guide on how to convert your anchored power rack into a lat tower using the Spud Inc Econo Pulley and some basic rack components. This conversion is very simple to set up, yet it gives you access to heavy lat pulldowns and cable rows; just to name a couple. This DIY set-up is much cheaper than owning an actual cable machine or lat tower, and it requires no floor space commitment when not in use. Many of you might even to be able to set this up without spending a penny.
So why do you need this rack conversion? You don’t! Your program probably doesn’t call for lat pulldowns or cable rows, and unless you’re a bodybuilder it’s likely that no program ever will. I just happened to miss the lat machine from my commercial gym days and figured that I wasn’t the only one who did.
Of course another completely valid reason for wanting a lat tower is if you lack the strength to do a pull-up, or if you still have excess weight that makes doing true pull-ups difficult. Lat pulldowns can absolutely help develop the strength to allow for pulls and chins.
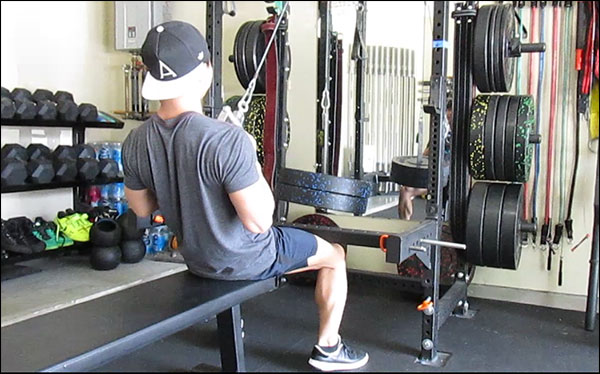
The Spud Inc Pulley system alone reintroduced access to a lot of those pulling movements. Unfortunately, without the leg braces of a lat machine (below), what we can pull down with any semblance of good form is limited. As the weight being pulled starts to exceed 50-75% of our body weight, it becomes harder and harder to keep your butt glued to the seat. This simple rack conversion addresses that.

So no, you probably don’t need a lat machine, but if you enjoy all the different pulls and can put this conversion together without spending a lot of money (or perhaps even no money), then why not? That having been said, if you do not even own the right kind of rack to begin this conversion, I certainly wouldn’t go out my way to try and make this work.
DIY Garage Gym Lat Tower

Before I get into what components you need for your DIY lat machine, let me comment on something:
I reference Rogue parts specifically in this article because those are the components that I happened to have on-hand, and they are the components that I know will work.
What makes these Rogue parts work so well is the consistent 5/8″ diameter holes and the consistent 2″ spacing between these holes across all of Rogue’s components. Both Infinity and Monster Lite spotter arms have 2″ spacing on the side of the arms, and the 43″ Infinity cross-members have mounting holes exactly 6″ apart (see below images.) I have no doubt that other manufacturers’ parts could be used for this project but you’ll have to confirm that for yourself. Here are the parts:
- Infinity-compatible or Monster Lite-compatible power rack, half rack, or rig; anchored
- Rogue Infinity or Monster Lite safety spotter arms
- Spare 43″ Infinity cross-member/stabilizer/pull-up bar †
- Flat utility bench
- Any combination of (4) total band pegs and/or detent/hitch pins †
- Spud Inc Econo Lat/Tricep Pulley
- Optional cable attachments (the Spud system only comes with the one)

Here are the rack components needed. A pair of spotter arms, 4 pins (any combination of detent pins, band pegs, or even bolts – though bolts seem cumbersome), and a 43″ horizontal cross-member.

The holes in the spotter arms line up perfectly with the mounting holes of the 43″ cross-member / stabilizer. To set up, just slide in pins. To break down, slide them back out. Takes seconds; literally.
† The 43″ R4 cross-member (the same piece used as a horizontal rack stabilizer) and the orange detent pins are not offered on the Rogue website for individual sale, but they can be ordered over the phone. You should already own at least 2 detent pins just from owning spotter arms, and you probably own a set of 4 band pegs already from when you bought the rack; so you shouldn’t need to buy any of these anyway. If for some reason you do, I would maybe look at 5/8″ detent pins on Amazon. Just make sure that they are long enough to pass through all components.
As you can see, the beauty of this set up; other than being far more affordable than formal lat pulldown machines; is that it assembles and disassembles in seconds, it’s completely adjustable for any height, and it doesn’t require you to commit any floor space when it’s not in use.
FIY!
There are a couple of things that I’ve learned as I’ve used my lat machine conversion. For starters, Thompson Fat Pad-equipped benches are not ideal for this conversion. They are just too damn high even for tall people (I’m 6’3″ and I couldn’t make it work).
Also, since it’s unlikely that you’ll be using that 43″ cross-member for anything else, you can string tie some form of padding around it if you find the sensation of pressing bare leg into it uncomfortable. It’s actually not uncomfortable if you set it up correctly (level), but I can see how padding would be a nice touch.
Some folks have used a pull-up bar instead of crossmember, and wrapped it in one of those foam pool noodles. Pretty solid idea.
My Attachments (in case you were wondering)
Most of the attachments that I use regularly are from American Barbell. AB offers both steel and aluminum, but I chose the aluminum attachments because they are lighter, made in the USA, and comfortable in the hands. The aluminum attachments are a little more expensive than the classic steel attachments that they offer but not by much, and considering these are pieces that I’ll never have to buy again, I was okay with a slightly more expensive and nicer variation.
Amazon has a plethora of attachments that you can get on the cheap – I own a couple of those as well. They don’t compare to the AB attachments obviously, but they do get the job done all the same. I’ve actually retired all of my non-AB attachments except for an Amazon tricep rope and the included nylon attachment from the Spud Inc Pulley (which happens to be a very versatile attachment by the way, and one that I like very much).
All of these are aluminum, American-made attachments from American Barbell, and although I have others, these are my favorites by far – especially the close-grip chinning handle in the middle, and the revolving pushdown handle on the left for tricep work.
I’m not a cable attachment ‘expert’ by any means, so I’m not going to pretend to be and tell you where to buy your attachments. Nor will I suggest that you have to spend a fortune on high-end attachments to get strong. It’s very likely that you’ll be used to some very specific attachment types and brands from your global gym days and you’ll want to go with those – by all means, do that.
On a different note, if you happen to own the tricep pushdown attachment or the multi-grip cable attachment from Rogue, I’d love to get some feedback on them. Leave a comment.

DIY Lat Pulldown Station – Summary
It’s not the fanciest thing, but it gets the job done. I have a back day that rolls around every four workouts, and I set this up every time. None of the cable-based pulls are primary lifts for the day, but I do a pretty good job of burning out my back during my tier 2 and tier 3 set. Again though, if you don’t own the proper rack or any of the rack components, you can certainly still row with a barbell. Don’t go out of your way to put this together if it’s going to cost you a small fortune.


This is so timely for me. I just recently ordered a cable, pulley and parts from Amazon for a DIY Spud INC type set up. I figured I’d be doing tricep pushdowns, face pulls and maybe cable ab crunches. But with your stroke of genius it looks like I get to do some pulldowns and seated rows also. YES! I just hate chins. I know, I know the benefits. ;)
I have a monster lite squat rack (with the conversion kit for plate storage to weigh it down) and I already have the spotter arms so all I need is the cross member and viola,,,, ready to row.
Question: do you have a problem with it swinging on you? I thought some strategically placed rope or bungee cords might solve the problem if there is one.
Do you mean the weighted end of the pulley swinging? If so, the fix to that is just all form and positioning. As you pull the attachment end away from the rack itself, the angle of the hanging pulley changes – that causes the swing. The way to avoid that is to choose an angle between you, the pulley, and the weight that is consistent throughout the whole movement. It sounds complicated, but I’ve not had a problem finding the ideal position for any movement I do, and I rarely find the weights swinging anymore.
What I did to solve the swing problem was to pick up two spud pulleys. I attached one to the rear upper support member of the rack and the other to the front upper support and then run the cable through both. Once I’ve set my weight, I’ll lift it off the ground and let it settle like a plumb bob and then drop it to the ground which gets everything into position. From that point on as long as I keep my angle close to the set point, the swing hasn’t been a problem. It sounds a little complicated, but it really isn’t a big deal once you get used to it. It’s a great product and really works well with any rack.
I have the Fringe Sports Colapsable folding rack. Will this work with this rack?
Also, i Have found, though not the best to just put a barbell, or a weighted barbell on your legs and it does an OK job of holding one’s but down on the seat, probably not as good as this but something if this doesn’t work. Let me know when you get a minute on the folding rack.
This would not be safe on a folding rack. Folding racks do not anchor to the ground, only the wall – which is probably worse than no anchors at all in this situation. Too much vertical force is applied too far from the center of the rack when it’s being used as leg braces like this. Definitely not a good idea.
Thanks. I have a old Weider Squat rack as well that has the lat pull down attached with bar runners for it. I really like it but the total rack takes up too much space. I was hoping this would be a good alternative.
How much is the crossmember from Rogue?
It’s $50 as an add-on to the Infinity racks. Not sure what their standalone price is. Can’t imagine it’s much different
Thanks. Just found it on their site for the ML series… pricey!! $105
http://www.roguefitness.com/monster-lite-crossmembers
There is an Infinity version for much cheaper. You can see it under the R-4 Power Rack, but I don’t think you can select it without ordering the rack. That’s why I suggested calling in the order.
Hey Bro, I’m very curious how this holds up for you over time. I’ve held off on buying this setup (Spud Inc) because of the reviews I’ve read, which state that over time, possibly due to the small diameter of the pulley, the cable wears out and frays. Let us know your thoughts and results.
I’ve heard that, and also complaints about the included caribiner being inferior to the rest of the hardware, but I’ve yet to have any problems myself. I actually have one wire poking out of the cable right about at the middle of the cable that I continuously catch my fingers on, but even with up to 200 pounds loaded regularly, it hasn’t spread or unraveled at all. I’m certain this whole thing could be much stronger if Spud wanted it to be, but it’s so damn affordable and I think that it’s more than strong enough. And technically, if you wanted, you could put this system together yourself and make it much stronger for probably the same amount of money – though you have to still buy a loading pin of some sort.
I got the steel loading pin from Rogue, $24 I believe, then a pulley from a fitness equipment parts company for $17 – smooth bearings and rated to 2000 lbs, cable from Home Depot.
IMO the Spud system is way overpriced for what it is.
Adding the crossmember for an anchor is a stroke of genius. I’ll be ordering one immediately for my rack since I already have the spotter arms. Thanks for the idea!
A reader commented on Facebook that he used the pull-up bar and wrapped it in a pool noodle… those foam floating things for kids. Really good idea if you happen to have an extra pull-up bar and no stabilizer. If I was going to have to buy something outright, I’d stick with the stabilizer. Flat = better, and it can still be wrapped in something if need be.
Yeah, the pool noodle with pull-up bar is not a bad idea either. I still like the cross-member more for the same reason you cited.
Nice idea. Instead of the Spud setup I bought the Rogue loading pin ($26) and then Home Depot for cable, pulley and parts. Half the cost of Spud and much stronger.
Could you show me your home depot pulley and what parts to buy. Pics
I think you could also use the R4 pins, much cheaper than the cross member, and slides through the holes on the spotting arms even more easily. You can then wrap a yoga mat around it for cushion and comfort.
I should try that – I have an old set of those. Should be the right length. They would definitely need padding though – that surface area is too small to be comfortable I’d think
Hey, did you ever give the pins a try? Still busy imagining my dream setup and thinking about how to best configure a pulley system in the future. If the pins work, I would also consider using the pins on the front of the base so you could use the low pulley upgrade in the front of the rack instead of the side. I suppose strong cable could do the trick also, but curious if the pins worked.
This site never gets old as long as there is more to upgrade lol.
Oh no I didn’t. I’ll try that out next time – I totally forgot about it.
Super cool! I tried using the idea with a barbell instead to save money on the crossmember and didn’t love it. Then I thought to use bands across the safety spotters. Works great and is comfortable! Linked a pic:
https://imgur.com/a/0fFmo4W
Thank you!!
I hadn’t thought of that or even heard of that – seems like a really good idea though! I can see the bigger bands definitely working for this.
I haven’t tried the rogue tricep handle but Spud has one that looks bigger than Rogues and I really like that one. Works the grip really well. And it’s bulletproof.
Spuds is the best.