My garage gym has only a single, three-bar gun rack, and I own more than three bars. I’ve been carefully leaning bars against the walls and even leaving some in an unused corner on the floor (rubber floors, don’t worry!) Since I like to keep my gym looking nice and clean, not having a place to put these bars was getting on my nerves, so I decided to make myself my own DIY barbell rack.
Updated January 2018 – just checking for any outdated info or dead links.

Garage Gyms’ DIY Barbell Rack
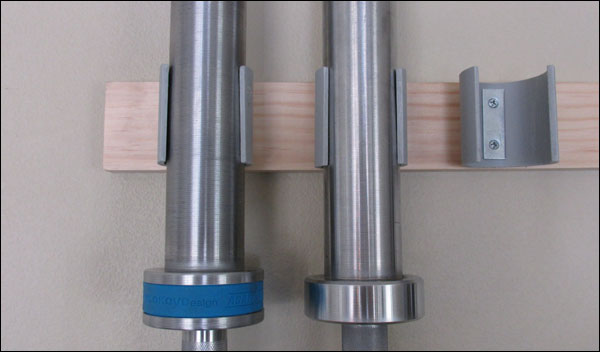
If you have the wall space for a gun rack, I strongly suggest just buying one. It’s obviously much simpler than building your own DIY barbell rack. Like I said, I have one already but it only holds three bars (below). I can’t really upgrade mine to a six bar holder because of where it is installed, and I don’t have any other convenient places on my wall wide enough to put a second gun rack. I needed a different solution.

With my gun rack above my dumbbell rack, I’d never be able to reach bars any higher, so a 6-bar gun rack is out of the question. It’s already not great grabbing for that top bar, and I’m taller than you!
I also didn’t really want one of those 9-bar vertical bar storage boxes that most equipment dealers sell. I just don’t like the idea of dropping nice bars into those metal sleeves. Some brands have a lined sleeve, which is better, and that does help reduce damage to the bar, but I also didn’t want to commit any floor space to storing bars. I simply wanted the bars as out of the way as possible, and that’s why I went with this kind of DIY bar rack.
Full disclosure, this isn’t an entirely original idea. I saw a picture of a DIY barbell rack some time ago that was more-or-less the same kind of rack. Unfortunately I didn’t save that link or picture, but it didn’t seem overly complicated so I just winged it and it turned out great. The really cool thing about a rack like this is that it isn’t load bearing (the bars are resting on the ground) so it can be built to hold any amount of bars.
DIY Barbell Rack Hardware
I went with cabinet-grade pine because it looked nice and wasn’t overly expensive. It also comes in 3″ and 4″ wide pieces which was perfect for this. You can use any wood you want though since it’s not a load bearing rack. Also because it’s not load bearing, you can mount the rack to the wall using wood screws; you don’t need to go crazy with wedge anchors or giant lag screws or anything like that.
You’ll need one mending plate and two screws per PVC cup. Make sure that your mending plates are countersunk, and that you buy the proper flat head screws that will sit flush with the plate. The mending plate packaging suggested ¾” #6 screws, but I went with 1″ #6 for a more secure hold.
- 1″ x 3″ x ?’ Select Pine Board ($6)
- 1″ x 4″ x ?’ Select Pine Board ($10)
- 2″ PVC Conduit ($5 for a 10′ piece)
- 2″ Zinc Countersunk Mending Plates ($0.75 per plate)
- #6 – 1″ Flat Head Philips Screws [2 screws per PVC holder] ($2 per 12 pack)
- 3″ wood screws for mounting top portion of rack to the wall (I already had these on-hand)

A shot of one of my PVC cups, the 1″ #6 screws, and 2″ zinc countersunk mending plate.
Tools I Used
- Drill (used various bits for pilot holes, and also a 1″ and 54 mm bit for base)
- Powered handsaw (I used this to cut the PVC; not recommended!)
- Jigsaw for cutting stall mat for base. Utility knife works too
- Tape Measure
- Level
- Screwdriver
- Electrical tape
- Construction adhesive/Liquid Nails
- Safety goggles!
- Pen, marker, whatever
The Pipes and the Rack
I cut the 2″ PVC pipe into 2½” long pieces. That makes them as tall as the 3″ piece of pine (as a reminder, 1″ x 3″ board is actually ¾” x 2½”, which is why I cut the PVC to 2½”). I cut out the mouth of my first PVC piece by guessing how big I wanted the opening to be. I got lucky, it worked well; small enough that it held the bar, but wide enough that it doesn’t take three guys to pull it back out.
I used that first cut piece as the template for all of the others so that there was consistency. I also sanded down the pieces when I was done, and gave the mouth a rounded edge since the bar needs to slip in and out of this gap. I doubt PVC can scratch a bar, but why risk it; it only took 10 minutes to sand the whole lot of them.

I used the same template for each piece so that they would all be uniform. I also took the rough edges off with some sandpaper after I cut them. I made more cups than I needed as back-ups.
I’m not sure I want to recommend cutting the pipe using the method I used, as I’m certain that it’s not the safest option out there (I used the electric handsaw for this – like a smaller sawsall.) If you have access to more/better tools than I do, cut it however you see fit. They are small pieces to cut with power tools, so whatever you do, be safe.
As you saw in the first picture, my bar holder can hold seven bars. Each cup is mounted 4″ apart which leaves a tad less than 2″ between each cup. I left extra space on both sides of the center holder because I knew that would be a permanent location for my Swiss Bar. You can place each holder closer, further, or whatever you choose. If you want to include space for specialty bars, I suggest laying them on the ground as if they were on the rack and then measuring the distances between the center of one bar to the next.
Let’s say you wanted to do a 6-bar holder; only for Olympic bars. Leave 3″ before you mark the board for your first holder. Then mark every 4″ until you’ve marked all six spots, add 3″ after the last mark then chop the rest of the board off. In this scenario, your board would be 26″ long.
Note: If you do have bars other than standard Olympic bars, or a mix of men’s and women’s bars, watch the length (or height, in this case) because they are not all the same. If you notice on my rack, I had to place the rack at a height that allowed for the cups to grab all of the bars, even the shorter Swiss Bar.
After you mark the board, figure out exactly where you’d actually hang it. You want to find at least two studs, and you want to make sure that those two studs aren’t lined up with any of your marks for the holders on the board. Once you found the spot and the height, level it, mark it, and drill pilot holes into the board and into the studs, but don’t actually hang it yet.

After I found my marks for mounting, I taped each piece of pipe onto the board exactly where I wanted them using electrical tape. Electrical tape has some play that allows you to re-position easily, and removes easily.
Once I knew where the board was going to go on the wall, I numbered each PVC cup and then placed all the PVC cups onto the board using electrical tape. This allowed me to get each cup on straight and centered without drilling any holes. Once everything was to my liking, I placed and visually centered the mending plates into the cup (above image) and then drilled pilot holes through the tape, pipe, and board. I then took each cup off the board, then set them aside sitting in the same position as they would go back on the board.
If your pilot holes for the mounting screws wouldn’t be covered up by the cups, you could technically attach the cups before mounting to the wall if you wanted to. My mounting screws were going to be hidden behind the cups if I installed them first, so I needed to mount the board before putting on the cups. Either way, that’s pretty much it. Once you get the board up, drop in the mending plates and start threading the #6 screws into the pipe, and then screw each piece into the board placing each cup where you initially had it.
You should definitely hand-tighten these screws rather than power drilling them in. If you strip out these holes, you’ll not be pleased!

Closer look of the PVC cups once mounted to the board. Not that complicated really.
I was getting a very small amount of rattling when I slammed the garage door (this rack is mounted on the same wall), and I not only didn’t want to listen to that, but I also didn’t want the bars hitting that zinc plate. I added a 3″ strip of rubber foam weatherseal self-stick tape to the inside of each cup. The bars fit perfectly, and there is not even a hint of noise. I also no longer need to worry about scratching the bars on that mending plate. Easy!

3″ strip of Rubber Foam Weatherseal self-sticking tape stops any rattling and risk of the bar scratching against the mending plate. Kind of ugly, but you can’t see it when the bar is in there anyway.
The Base

The rubber-lined base plate of my DIY barbell rack.
This piece is pretty simple. It’s the exact same length as the top board, only it’s 4″ wide instead of 3″. There is exactly 1″ distance between the wall and where the actual bar sits in the top section of the rack, so I left exactly 1″ of distance between the wall and where the bar sits in the base. This way, the bar is standing straight up and down, and not leaning in any direction and putting any strain on the cups.
I used a 54 mm drill bit to put the holes in the base, and since this base board is the same length as the top board, all the marks went in the same place. Again, these holes are not centered along the width; they are exactly 1″ away from the edge of the board (the wall) which makes the holes closer to the front.
Since I didn’t want bars resting on concrete, I cut up a spare stall mat to be the same size as the board and attached it under the board. I used construction adhesive to hold the pieces together, and then for good measure I countersunk a couple of wood screws with 1/8″ – 1″ washers into the underside of the mat and into the wood. I used a 1″ drill bit on the mat for the countersinking.
You can attach the base either to the floor, or the wall. I just used liquid nails, but it can be anchored with concrete anchors, or nailed into the wall much like a baseboard. Your call. Do make sure you have the base centered with the top of the rack though, otherwise your bars will be leaning, and if you have OCD like me, you’ll see that every time you look at the rack.
End?
My DIY guides probably leave much to be desired, and no doubt I’ve left something out. So my disclaimer… plan it out, think it through, wear safety goggles, and measure twice. This is a simple project, but if you don’t take your time, you’re bound to screw something up, and no one likes to start over. I still suggest a gun rack if you have the space for it though.
If you have any questions, leave it in the comments; I try to answer all comments that include questions. Good luck!


Thank you very much for this tip. I was able to make a 4 barbell holder out of scrap wood in the garage with the only purchase being the 2″ PVC and hardware to attach it to the wood. Super easy project and I went an extra step and stained the wood to make it look extra sharp. Thanks again, you saved me $$$$!
Dave
Awesome. I’ve been hoping someone else would do this; it’s so easy, and inexpensive.
Have to move across the country for work. Anyone have any Do’s/ Don’ts in terms of getting them through the move in scratched, dinged or bent?
Try and find someone’s old bar shipping tubes.
Carpet remnants
I’d suggest some kind of safety measure to ensure those barbells stay in place and don’t slip out of the pvc. I’ve got three little boys who’d love to yank on them. A heavy object like that can kill a kid or a pet that happens to be in the wrong place. Perhaps a piece of chain or something?
Probably a good idea for those that have kids. There are none here, so it never occurred to me.
For anyone looking to add the extra safety measure to the PVC cups when not in use, I have had good experiences using standard storage straps with plastic buckles. These usually come in a package with all of the required mounting hardware, low in cost, and can be attached is several different ways. I have included a link to just one example: http://www.leevalley.com/US/Wood/page.aspx?cat=3,40914&p=69636
Is leaving a bar unloaded on the ground a bad thing? That’s what I’ve been doing with my bar
No it’s fine like that. It’s just not ideal when there is a chance someone can trip on it, but it won’t hurt the bar or anything.
Cutting the clips more safely.
If you were to work out how much PVC pipe was needed to make the amount of clips required plus 2MM for each cut and a couple of inches for luck then you could set a table saw to a height such that the blade stayed inside the pipe during the cut and make the two longitudinal cuts first and then cut the clips to length and sand them. you might have to reference the pipe by attaching a strip of wood to rest against the fence to stop the pipe rotating but it would be worth the effort be safer and screw holes used to attach the strip of wood could be positioned so as to be ultimately be hidden by the mending strip. good project by the way
Great how-to. Thanks. Will do this myself the same way.
Good idea. I think a thin strip of rubber stall mat would work better for the top. just cuts spots for the bars 1/8″ less than the bar for a tight friction fit. Rubber mats would hold the bars tighter and no worries about scratching them up. Might use 2 strips of rubber sandwiched around a small piece of wood to make it easier to attach to the wall.
Thanks for the DIYBarbell rack tutorial. You said you guessed on the size of the mouth on the pvc but I don’t see that you ever stated the measurement. Mind sharing? Thanks!
It’s a hair under 1-3/4″ – about 1/4″ smaller than the diameter of the sleeves.